Peoria, Il. Drywall Repair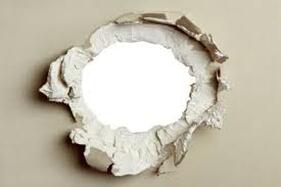
Peoria Drywall Repair: Are you in Central Illinois with the need for drywall repair? Have holes, stress cracks or simply remodeling a space and need it to look brand new again? Having repaired drywall for over 20 years in Central Illinois, we work with the top major Fire/Water Restoration contractors and are relied on to perform all major drywall/plaster repairs. We are given the most important and complex projects because of our experience and ability to deliver amazing results. Give us a call if you are experiencing the following: • Need Holes Patched - Patching of small holes, nail holes and large cut outs of the ceiling or walls. • Fire Damage Repair | Water Damage Repair -Have Damaged Drywall? Have you had recent Water Damage from a leaking roof, leaking plumbing fixture or running water. Perhaps Fire Damage? We can help. Hire us to remove, prep and ready your ceilings or walls for paint. • Experiencing Cracking, Blistering tape joints - Are you experiencing blistering tape and cracking due to settlement issues? We can help. Call us today to repair your ceilings and walls. • Really, No Time - Have you started a project and need someone to help you complete it because of a time constraint? Perhaps a project you have no time or patience for? • Remodeling - you are remodeling a space and need for the drywall to "match" from room to room. We can help with patching and matching the existing look for a flowing finished product that will stand out and look professional. |
|
Drywall repair prep process for flooring: Prepping for drywall repair is just as important as the finial look because you want it to last forever! We first start by protecting all flooring and it starts at the front door. Using drywall plastic, we will lay done a thin layer to protect the surface and keep it clean. Then follow the quickest, shortest path to the room or rooms that have the work being done to them. Then protect all flooring in that space. Next we remove any light switch covers. Then cover any electrical outlets with tape. Next we will cover any ceiling fans with the drywall plastic. And any lighting fixtures that are permanent. Once all work is completed, we will remove all prepped rooms to reveal a crisp clean look that will require little to no clean up.
Drywall repair ceilings: Ceilings can come in all different shapes and levels of damage done to them. From full tear outs to a few nail pops. Our process for drywall repair on ceilings is to first make sure whatever has caused the damage is corrected. Like a leaky roof. Once that is determined we will find the best possible way to do the repair in the quickest amount of time and to look its best.
Drywall repair walls: Walls are the most common for repair because they are easily seen by most guests. Our process for repairing sheetrock on walls is to first determine with you what it is you want done and if it is to refinish the existing texture, and repair it accordingly. Most often times, it is not good practice to attempt to match the texture, if in fact is is already texture and not a smooth finish. We will usually wind up, again depending on how big the repair is and the level of perfection you're looking for, texture the entire wall so that it matches.
Examples of Peoria Drywall Repair:
Selling Home: Selling your home for top dollar and in the quickest time possible will require prospective buyers are not seeing damage done to your ceilings or walls. It is why having nice looking ceilings and walls is needed if you intend on selling. Cracks, holes, dings or dents are common and the sooner you tend to them the less there is to fix come time to sell. You also want to have the walls looking good as well as any and all ceilings if you expect to hire a realtor to take on the listing. Sure they are in it for the money, but they want to see it move just as quickly as you do. The only difference is you intend on selling it at the highest price possible and in the least amount of time, therefore have decided to have the drywall looking new for not only the realtors who will be showing the home but most importantly prospective buyers. Keep in mind, most homeowners are using a bank to buy their home and not cash. Therefore can complicate the selling process. Where as an agent of the bank will be sent out to inspect the home, although a third party it is just another set of eyeballs coming to look at the drywall and if there are any signs of water damage or settling it will slow the sale and could cause it to fall through if you are not able to fix the issue. Fix it before anyone else sees it and save yourself time and ultimately it will make you more money!
Remodeling: You have decided to remodel and now comes time for drywall. If you are connecting a room or two to each other or taking down a wall or two, you must have it flow seamlessly, otherwise all the time and energy you put into your new space will be made to look like a bad idea. Never dumb down the quality of a new remodel with average drywall repair work.
Fixing Drywall Nail Pops: Nail pops are common with most homes and are an easy fix. It is the texture matching that becomes a challenge. Home built before 1990 were built using nails to fasten the drywall sheets to either the ceiling or walls. Thus the term nail pop. Nail pos are caused by the loosening of the nail that holds the board and over time pops through. In older homes, it comes down to settling and when the house gets hot or cold or shifts so does the drywall. In new construction often times homes are built in the rain or colder months and when the lumber used to build the home has moisture in it, and the drywall is installed before it has "dried out" it is a recipe for disaster. As the wood dries under the new drywall, it shrinks and causes pressure on the fastener causing it to pop. Today nails are no longer supposed to be used and screws are the new standard. A top Peoria drywall company, will use not only screws to hang your drywall but also use glue. Construction adhesive that provides a superior strength to the drywall system and all but eradicates any sign or nail pops. To fix nail pops you can either do a re-seat where you drive the old screw or nail back in and go over it on the side with a new screw. Or pull out the old and replace it with a new screw. Experts will remove the old drywall nail or drywall screw and replace it with a new one into a different hole, near the failed fastener.
Fixing Drywall Cracks on Ceiling: Fixing hairline cracks on the ceiling requires skill. First you want to remove any old or loose tape and make sure the drywall or plaster on ceiling is firm and not wet or damaged. Next a piece of tape will be applied over the crack and anywhere between 3 and 4 coats of compound to get it smooth. If the ceiling is textured it will require a full re-texture for the drywall to be a perfect match
Fixing Drywall Cracks on Wall: Cracks on the walls are usually caused from the house or building settling, but can also be caused by the tradesman error. For example, breaking over a picture window or door. Instead of doing once full sheet of drywall it gets pieced in and tends to crack from the shutting of the door over time. The same process for fixing cracks on the ceiling goes on the walls. You want to first determine the crack has no blistered tape and that it is solid. Next you tape it and apply several coats to get it smooth. And lastly, apply a texture to the entire surface so that it matches perfectly.
Fixing Drywall Holes on Wall: Drywall holes can be caused by someone punching it, someone cutting into it, from it getting wet and even a snowmobile hitting it. "yes I have seen it!?" If the hole is less than 3" inches in diameter a patch can be used and no need to add wood backing. But if the hole is larger than 3" wood backing will be needed to screw the new drywall into. We use a 2" screw to set the wood and a 1 1/4" screw for the drywall itself. Once the hole is patched, we will tape and finish it and apply a texture if the wall is not smooth.
Fixing Drywall Holes on Ceiling: Holes on a ceiling differ from those on a wall for one reason. Gravity, you have to generally use a wood backing to patch all holes on a ceiling. If you don't as the patch dries, it tends to sag and the gravity causes it to fallout. Once the wood is cut and installed inside the hole the drywall is installed. Then 3-4 coats of mud put on and followed by a texture, if needed.
Skim Coating Drywall Smooth: Skim coating requires full coverage to either a wall or ceiling that needs to be completely smooth.Most common reasons for skim coating a ceiling or wall with remodeling relates to anyone who is tired of the rough feel. And done with scraping their hands on it. Skim coating requires several coats of compound to reach a level 5 finish. While it will not be perfect to the touch, it will be to the naked eye.
Matching Drywall Texture: Matching drywall texture is one of the hardest things to do as it relates to drywall repair. Often times, it is impossible for it to match perfectly. If you know this going in you are able to make the decision as to whether or not the level of finish or how well it matches is as important you you as the cost. In most cases where texture matching will be done, best practices to re-texture the entire ceiling or wall with damage, to ensure a consistent match from one end to the other. Ultimately you wan to be able to stand anywhere in the room as see no difference in the consistency of texture. When it all looks the same, your job is done.
(309) 681-5500
Expert Peoria Drywall Ceiling Repair: Restoring Structural Integrity and Aesthetic AppealThe ceiling is a fundamental component of any building, providing overhead protection and insulation while contributing to the overall aesthetic of a room. When damage occurs to a drywall ceiling, whether from water leaks, structural issues, or accidental impacts, it's essential to address it promptly to prevent further deterioration and maintain the integrity of your home or business. At Peoria Drywall Repair, we specialize in expert drywall ceiling repair services tailored to restore both functionality and beauty to your space. Here’s everything you need to know about drywall ceiling repair and why you should trust us with your project:
Common Causes of Drywall Ceiling Damage
Drywall ceiling damage can stem from various factors, each requiring specific repair techniques:
Professional Assessment and Customized Solutions
Our experienced technicians begin each drywall ceiling repair project with a thorough assessment to evaluate the extent of the damage and identify underlying issues. The repair process typically involves:
Peoria Drywall Repair Experts: We prioritize using premium materials and proven techniques to deliver superior results:
Maintaining a well-kept ceiling not only enhances the visual appeal of your interior spaces but also contributes to the overall value of your property:
At Peoria Drywall Repair, we are committed to delivering exceptional service and ensuring your satisfaction throughout the repair process:
Common Causes of Drywall Ceiling Damage
Drywall ceiling damage can stem from various factors, each requiring specific repair techniques:
- Water Damage: Leaks from plumbing issues, roof leaks, or condensation can cause ceiling drywall to become stained, saggy, or even develop mold.
- Structural Issues: Over time, settling of the building, foundation movement, or structural shifts can lead to cracks, seams opening up, or even sections of the ceiling becoming detached.
- Accidental Damage: Impacts from falling objects or accidental collisions can cause holes, dents, or cracks in the ceiling drywall.
Professional Assessment and Customized Solutions
Our experienced technicians begin each drywall ceiling repair project with a thorough assessment to evaluate the extent of the damage and identify underlying issues. The repair process typically involves:
- Damage Evaluation: We carefully inspect the affected area, assessing the severity of the damage and any potential structural concerns.
- Surface Preparation: Proper preparation is key to achieving a lasting repair. We clean the damaged area, remove debris, and ensure the surrounding surfaces are protected.
- Repair Techniques: Depending on the type and extent of damage, our technicians employ specialized techniques such as:
- Patching and Filling: For small holes or cracks, we patch and fill using high-quality joint compound or plaster to restore a smooth surface.
- Drywall Replacement: In cases of severe damage or large sections needing repair, we may recommend replacing damaged drywall panels to ensure structural integrity.
- Water Damage Restoration: Addressing water-damaged ceilings involves not only repairing the visible damage but also identifying and remedying the source of the water intrusion to prevent future issues.
Peoria Drywall Repair Experts: We prioritize using premium materials and proven techniques to deliver superior results:
- High-Quality Products: We use industry-leading drywall compounds, tapes, and finishing products that ensure durable repairs and a seamless finish.
- Expert Craftsmanship: Our technicians are trained in the latest drywall repair techniques, including blending textures and achieving smooth finishes that match the existing ceiling.
- Attention to Detail: We meticulously feather and sand repaired areas to ensure they seamlessly blend with the surrounding ceiling texture and paint.
Maintaining a well-kept ceiling not only enhances the visual appeal of your interior spaces but also contributes to the overall value of your property:
- Curb Appeal: A repaired ceiling improves the aesthetic appeal of your home or business, creating a more polished and inviting environment.
- Property Maintenance: Addressing ceiling damage promptly helps prevent further issues and costly repairs, preserving the longevity and durability of your property.
At Peoria Drywall Repair, we are committed to delivering exceptional service and ensuring your satisfaction throughout the repair process:
- Transparent Communication: We keep you informed every step of the way, from initial assessment to project completion, addressing any questions or concerns you may have.
- Timely Completion: We work efficiently to minimize disruption to your daily routine and complete projects within agreed-upon timelines.
- Quality Assurance: Our dedication to quality craftsmanship means we stand behind our work, offering warranties on materials and labor to provide you with peace of mind.
Comprehensive Drywall Wall Repair Services: Restoring Beauty and Functionality
Drywall walls are a staple in modern construction, providing structure, insulation, and a smooth surface for interior spaces. However, over time, walls can become damaged due to various factors, including accidental impacts, water leaks, or general wear and tear. Addressing these issues promptly with professional drywall repair services is essential to maintain the structural integrity and aesthetic appeal of your home or business. At [Your Drywall Repair Company], we specialize in expert drywall wall repair services tailored to meet the unique needs of our clients. Here’s everything you need to know about drywall wall repair and why you should trust us with your project:
Common Causes of Drywall Wall Damage
Drywall walls can sustain damage from a variety of sources, each requiring specific repair techniques:
Professional Assessment and Customized Solutions
Our skilled technicians begin each drywall wall repair project with a thorough assessment to evaluate the damage and underlying issues. The repair process typically includes:
At Peoria Drywall, we prioritize using premium materials and proven techniques to achieve superior results:
At Peoria Drywall Repair we are committed to delivering exceptional service and ensuring your satisfaction throughout the repair process:
Drywall texture plays a crucial role in the overall look and feel of interior spaces, adding depth, character, and visual interest to walls and ceilings. Whether you’re building a new home or renovating an existing space in Peoria, Illinois, understanding the different types of drywall textures and their applications can help you achieve the desired aesthetic for your project. At Peoria Drywall, we specialize in expert drywall texture application and repair, ensuring impeccable results that enhance both the beauty and functionality of your interior surfaces. Here’s everything you need to know about drywall texture:
Types of Peoria area Drywall Texture
Drywall texture refers to the decorative finish applied to drywall surfaces, creating visual interest and covering imperfections. Some common types of drywall texture include:
Choosing the right drywall texture depends on several factors, including the desired aesthetic, the architectural style of the space, and practical considerations such as maintenance and durability:
Achieving a flawless drywall texture requires skill, precision, and the right tools. At [Your Drywall Services Company], our team of experienced technicians specializes in:
Transform your interior spaces with the expert drywall texture services of Peoria Drywall. Whether you’re renovating a residential home or updating a commercial property in Peoria, Illinois, our team is dedicated to delivering impeccable results that exceed your expectations. Contact us today for a free estimate at 309-681-5500.
Drywall walls are a staple in modern construction, providing structure, insulation, and a smooth surface for interior spaces. However, over time, walls can become damaged due to various factors, including accidental impacts, water leaks, or general wear and tear. Addressing these issues promptly with professional drywall repair services is essential to maintain the structural integrity and aesthetic appeal of your home or business. At [Your Drywall Repair Company], we specialize in expert drywall wall repair services tailored to meet the unique needs of our clients. Here’s everything you need to know about drywall wall repair and why you should trust us with your project:
Common Causes of Drywall Wall Damage
Drywall walls can sustain damage from a variety of sources, each requiring specific repair techniques:
- Holes and Gouges: Accidental impacts from furniture, doorknobs, or moving items can create holes or gouges in the drywall.
- Cracks and Settlement: Settlement of the building, minor structural shifts, or temperature fluctuations can lead to cracks or seams opening up in the drywall.
- Water Damage: Leaks from plumbing issues, roof leaks, or condensation can cause drywall to become stained, warped, or develop mold.
Professional Assessment and Customized Solutions
Our skilled technicians begin each drywall wall repair project with a thorough assessment to evaluate the damage and underlying issues. The repair process typically includes:
- Damage Evaluation: We inspect the damaged area, assess the severity of the damage, and identify any potential structural concerns.
- Surface Preparation: Proper preparation is essential for a lasting repair. We clean the damaged area, remove debris, and protect surrounding surfaces from dust and damage.
- Repair Techniques: Depending on the type and extent of damage, our technicians employ specialized techniques such as:
- Patching and Filling: For small holes or cracks, we use high-quality joint compound or spackling to patch and fill the damaged areas, ensuring a smooth finish.
- Drywall Replacement: In cases of severe damage or large sections needing repair, we may recommend replacing damaged drywall panels to restore structural integrity.
- Texture Matching: We carefully blend textures to ensure repaired areas seamlessly match the existing wall texture, whether it's smooth, textured, or patterned.
- Patching and Filling: For small holes or cracks, we use high-quality joint compound or spackling to patch and fill the damaged areas, ensuring a smooth finish.
At Peoria Drywall, we prioritize using premium materials and proven techniques to achieve superior results:
- High-Quality Products: We use industry-leading drywall compounds, tapes, and finishing products that ensure durable repairs and a seamless finish.
- Expert Craftsmanship: Our technicians are trained in the latest drywall repair techniques, including feathering, sanding, and texture matching, to achieve professional-grade results.
- Attention to Detail: We meticulously feather and blend repaired areas with the surrounding surface, ensuring a uniform appearance that enhances the overall aesthetic of your space.
Enhancing Property Value and Appearance
- Curb Appeal: Repairing damaged walls improves the aesthetic appeal of your home or business, creating a more polished and inviting environment.
- Property Maintenance: Addressing wall damage promptly helps prevent further issues and costly repairs, preserving the longevity and durability of your property.
At Peoria Drywall Repair we are committed to delivering exceptional service and ensuring your satisfaction throughout the repair process:
- Transparent Communication: We keep you informed every step of the way, from initial assessment to project completion, addressing any questions or concerns you may have.
- Timely Completion: We work efficiently to minimize disruption to your daily routine and complete projects within agreed-upon timelines.
- Quality Assurance: Our dedication to quality craftsmanship means we stand behind our work, offering warranties on materials and labor to provide you with peace of mind.
Drywall texture plays a crucial role in the overall look and feel of interior spaces, adding depth, character, and visual interest to walls and ceilings. Whether you’re building a new home or renovating an existing space in Peoria, Illinois, understanding the different types of drywall textures and their applications can help you achieve the desired aesthetic for your project. At Peoria Drywall, we specialize in expert drywall texture application and repair, ensuring impeccable results that enhance both the beauty and functionality of your interior surfaces. Here’s everything you need to know about drywall texture:
Types of Peoria area Drywall Texture
Drywall texture refers to the decorative finish applied to drywall surfaces, creating visual interest and covering imperfections. Some common types of drywall texture include:
- Smooth Finish: Smooth drywall is completely flat and free of texture. It offers a clean, modern look suitable for contemporary interiors where a sleek, uniform appearance is desired.
- Orange Peel: This texture resembles the skin of an orange, with a slightly bumpy surface that adds depth to walls while still providing a relatively smooth finish. It’s popular for hiding minor imperfections and is commonly used in both residential and commercial settings.
- Knockdown: Knockdown texture involves applying a slightly thicker mixture of joint compound to the drywall surface and then flattening it with a drywall knife or trowel. The result is a textured finish with varying degrees of peaks and valleys, creating a more rustic or traditional look.
- Popcorn or Acoustic: Popcorn texture consists of small, irregular bumps that resemble popcorn kernels. It’s often used on ceilings to help absorb sound and reduce echoes, making it ideal for areas where noise control is a concern.
- Skip Trowel: Skip trowel texture involves applying joint compound to the drywall surface in random sweeping motions and then lightly flattening it with a drywall knife or trowel. This technique creates a subtle, textured finish that adds depth and dimension to walls.
Choosing the right drywall texture depends on several factors, including the desired aesthetic, the architectural style of the space, and practical considerations such as maintenance and durability:
- Interior Design: Different textures can complement various interior design styles. For example, smooth finishes are popular in modern and minimalist interiors, while textured finishes like knockdown or skip trowel can add character to traditional or rustic spaces.
- Lighting Effects: Drywall texture can interact with lighting to create visually interesting effects. Textured finishes may cast shadows that enhance the texture’s depth and create a dynamic interplay of light and shadow.
- Maintenance: Textured finishes may require different maintenance approaches compared to smooth finishes. For example, popcorn texture can accumulate dust and may be more challenging to clean than smoother textures.
Achieving a flawless drywall texture requires skill, precision, and the right tools. At [Your Drywall Services Company], our team of experienced technicians specializes in:
- Texture Application: We use advanced techniques and quality materials to apply drywall texture evenly and efficiently, ensuring consistent results across all surfaces.
- Texture Matching: Whether you’re remodeling a single room or an entire property, we can match existing drywall textures seamlessly to create a cohesive look throughout the space.
- Texture Repair: From repairing small patches to blending textures on larger areas, we have the expertise to restore damaged drywall textures to their original appearance.
Transform your interior spaces with the expert drywall texture services of Peoria Drywall. Whether you’re renovating a residential home or updating a commercial property in Peoria, Illinois, our team is dedicated to delivering impeccable results that exceed your expectations. Contact us today for a free estimate at 309-681-5500.
